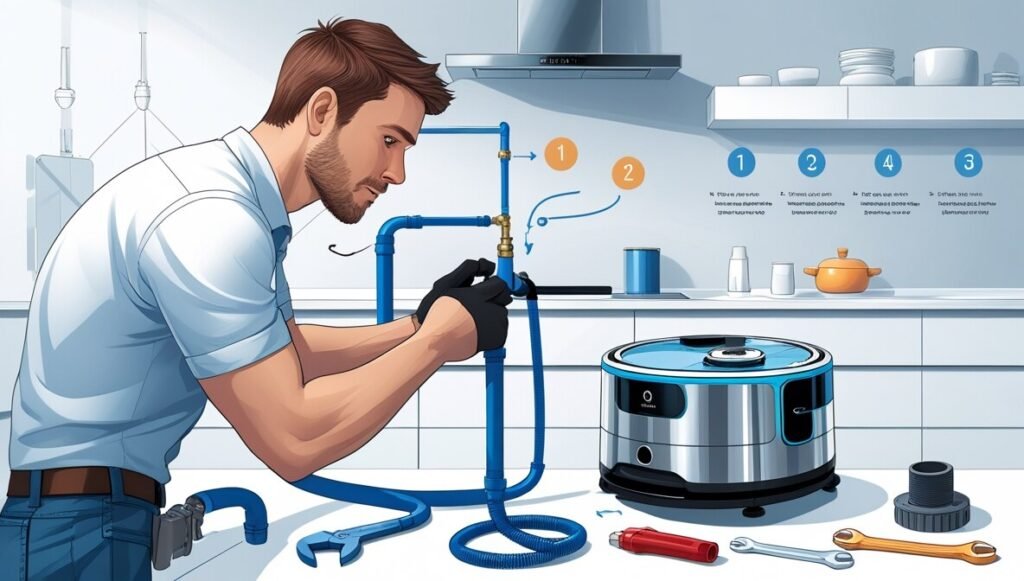
Robot cleaners have transformed home cleaning by combining smart technology with practical features. If you’ve purchased a model that requires a dedicated water supply, it’s essential to install the water pipe correctly for optimal performance. Whether you’re setting up a robot vacuum designed for mopping or a floor cleaning robot system with advanced features like combined vacuuming performance, a proper installation ensures you get the most out of your smart investment. This user-friendly guide will teach you Water Pipe for Robot Cleaner step by step, ensuring minimal issues and maximum efficiency.
Tools and Materials Needed: How to Install Water Pipe for Robot Cleaner
Before you start installing the water pipe, gather the required tools and supplies. This step is essential to make the setup process smooth and efficient.
Tools:
- Pipe cutter
- Adjustable wrenches
- Screwdrivers
- Pliers
- Tape measure
- File or sandpaper to smooth pipe edges
Materials:
- Flexible water supply line (durable and easy to maneuver)
- Threaded connectors
- Plumber’s tape
- Rubber seals or gaskets
- Pipe clamps (optional for added stability)
- Dishwasher water inlet tee (if sharing a line)
- Drain line adapter (for dirty water pipe attachment, if applicable)
Pro tip: Quality materials are crucial to avoid leaks or issues like water damage later! If your robot comes with an automatic water station or external water tank assembly, ensure compatibility with the pipe system.
Step-by-Step Guide on Installation Water Pipe for Robot Cleaner
Here’s a detailed yet simple guide to help you connect the water supply to your robot cleaner.
1. Prepare for Installation
Start with preparation to avoid interruptions later.
- Choose the location: Place the base station on a flat surface close to a power outlet with proper clearance for precise navigation. It’s ideal if the area is near a cold water supply to ensure direct access.
- Turn off the main water supply: You don’t want a sudden gush of water while working.
- Clear the space: Tidy up under sinks, around kitchen cabinets, or wherever you’re connecting the line. If your robot vacuum is stored under cabinet toe kicks, measure the space first.
- Check for blockages in the cold water pipe or any existing dishwasher pipes that you might intersect for the connection.
By setting up a neat workspace, you’ll make it easier to complete the process efficiently.
2. Measure and Cut the Pipe
Accurate measurements prevent leaks and reduce stress on connections. Here’s what you need to do:
- Use a tape measure to calculate the exact distance between the water source and the robot cleaner’s water station.
- Add an extra 4–5 inches to the length to allow flexibility during installation.
- Mark the pipe length and use a pipe cutter to make a clean cut.
- Smooth out rough edges with sandpaper or a file to avoid damaging seals.
Pro tip: Ensure there’s enough pipe slack to move your robot’s base station slightly, especially if stored near cabinet toe kicks or tight spaces.
3. Attach Connectors and Seals
To avoid leaks and ensure a proper fit, attach the connectors securely.
- Wrap plumber’s tape around the threads where the connectors will attach. This creates a watertight seal.
- Attach the connectors to the pipe ends. Double-check they are compatible with the inlet of the robot cleaner.
- Fit rubber seals inside connectors for added prevention against leaks.
Test the connectors before finalizing to guarantee they align correctly.
4. Connect the Pipe to the Robot Cleaner
Attach one end of the pipe to the robot cleaner’s inlet, connecting it securely for seamless functionality.
- Align the connector with the robot cleaner’s clean water tank or water station.
- Tighten the connection by hand, then use a wrench for a snug fit.
- For additional support, use pipe clamps to hold the connection steady, ensuring nothing loosens due to minor movements.
If your cleaner uses dirty water tanks or dirty water pumps as part of its function, be mindful of properly aligning those as well.
5. Connect the Pipe to the Water Source
The other pipe end will go to the water source (e.g., an external water tank or cold water supply line near a sink).
- Attach the connector to the cold water supply or dishwasher water inlet tee if sharing the supply line.
- Tighten the joint securely but without over-tightening, which can damage seals.
- Make sure the pipe runs straight and isn’t bent or pinched to prevent flow issues like a drain pipe gurgle.
6. Test the Installation
Testing ensures your setup is functional and leak-free.
- Gradually turn on the water supply and check for leaks along the pipe and at connections.
- Run the robot cleaner to confirm that clean water flows into the system as expected.
- Inspect for proper suction power during vacuuming and mopping modes, and confirm the dirty water tank fills appropriately if your robot has this feature.
Troubleshooting tips: If you encounter water pooling or improper operation, disassemble the problem points, reapply plumber’s tape, and retighten.
Maintenance Tips for Longevity
To keep your system running smoothly and avoid issues like water damage, regular maintenance is key.
- Inspect regularly: Check the connectors, seals, and hoses for wear.
- Flush the pipe: Periodically clean the pipe to remove debris or buildup that could block clean water flow.
- Replace parts as needed: Faulty seals, connectors, or clamps should be changed immediately to prevent leaks or pipe bursts.
Proper care will not only keep your floors spotless but also prevent problems with direct water exposure or dirty mop water accumulating over time.
Conclusion
Learning how to install a water pipe for your robot cleaner doesn’t have to be overwhelming. With the right tools, guidance, and some patience, you can complete this task easily. Proper installation ensures that your robot cleaner delivers its best performance, whether it’s vacuuming tangled hair from carpets, mopping kitchen floors, or avoiding -go zones around sensitive areas.
For smart home enthusiasts, combining your cleaner with a smartphone app for precise navigation and Smart home compatibility takes your cleaning game to the next level. Whether you have a standalone robot cleaner or one with an external water tank assembly, the ultimate goal is seamless cleaning with minimal manual effort.
By following these instructions, you’ll save time, enjoy spotless floors, and maximize the combined cleaning performance of your robot vacuum and mop system. If you face challenges along the way, consulting a professional plumber or reviewing the cleaner’s manual can help ensure success. Here’s to effortless home maintenance with your new smart cleaning assistant!

Anamika is a passionate writer for Eco365Store.com, specializing in topics that inspire a cleaner, greener world. With expertise in home cleaning, recycling, and eco-friendly solutions, she crafts engaging and informative articles that help readers adopt sustainable practices in their daily lives.